You can reimport a document that has already been imported into a project. Doing so will replace the file in the project and will completely redo the segmentation and the creation of tags for the document. This can be useful if you decide you wanted to use different filter options during import, if you have changed segmentation rules and wish to apply, or if you have made changes to the original document itself (such as removing superfluous formatting) and wish to work with the modified version of the document in Déjà Vu.
Reimporting will cause your translations to disappear. The translations can be retrieved later by Déjà Vu if they have been saved to the TM.
Detailed instructions for reimporting a file and retrieving translations for it follow. Click on the version of Déjà Vu you are using to see the instructions:
 Déjà Vu X2 Déjà Vu X2 |
 Déjà Vu X3 Déjà Vu X3 |
| |
|
- Create a new TM:
- Access the menu option File>New and select Translation Memory from the menu that comes up.
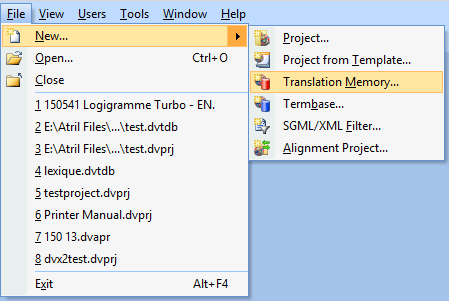
- Follow the Translation Memory Creation Wizard.
- Close the new TM you just created.
- Attach the new TM to the project:
- Access the menu option Project>Properties.
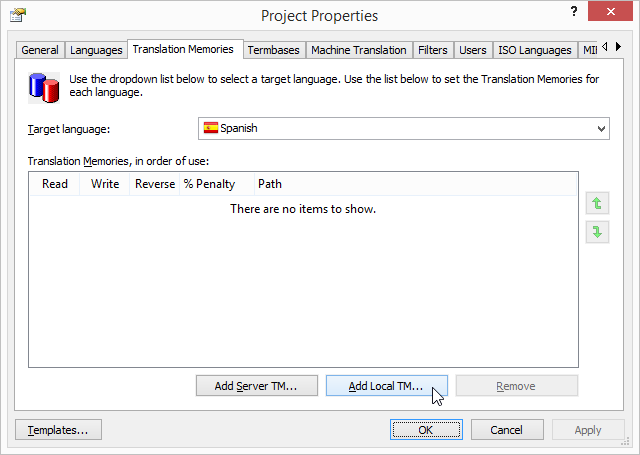
- Select the Databases tab.
- Click on Add Local TM....
- Select the new TM you just created.
- Click OK.
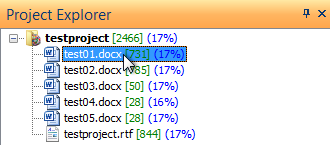
- Open the file that won’t export by double-clicking on it in the Project Explorer.
- Send the file to the new TM:
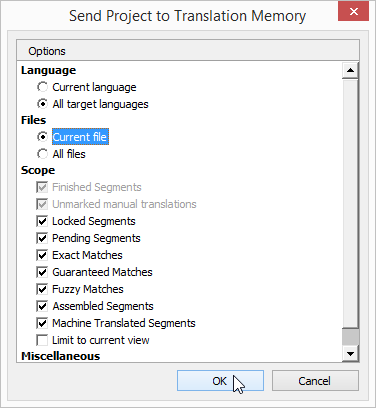
- Access the menu option Project>Send Project to Translation Memory.
- In the dialog that appears, make sure that the options All Target Languages and Current File are selected.
- Make sure that all the options under the heading of Scope are checked, except for Limit to current view.
- Reimport the file that won’t export:
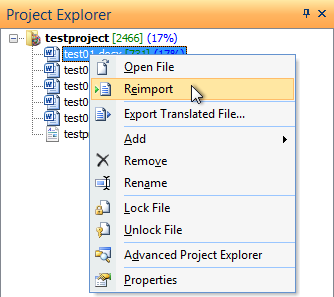
- Right-click on the file’s name in the Project Explorer.
- If you need to use a different filter to reimport the document, or you need to use different options, modify the filter properties for the file now.
- Select the option Reimport.
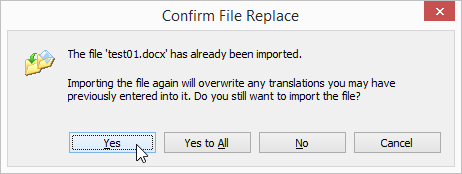
- If you are shown a warning that reimporting will cause your translations to be deleted, don’t worry: the new TM we sent the file to before has every translation in it.
- Accept the warning.
- Once the file has been imported, pre-translate it.
- Check the translations and finish up any segments that may have been left only partially translated (only a few, most likely).
- Run an automated tag check (Ctrl+Shift+F8) to make sure the tags are okay.
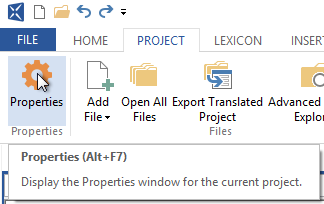
- Access the section of the Ribbon called Project, and in the Properties section click Properties.
- The Project Properties dialog opens. Select the Translation Memories tab:
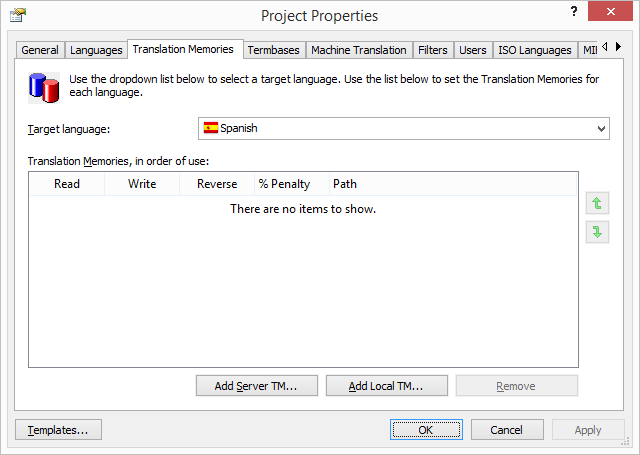
- Click Add Local TM....
- A dialog called Select Name and Location of Translation Memory appears. You can use this dialog to select an existing Translation memory, or to create a new one.
- When you are done selecting a Translation Memory, click OK.
- Open the file that won’t export by double-clicking on it in the Project Explorer.
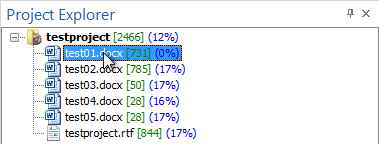
- Send the file to the new TM:
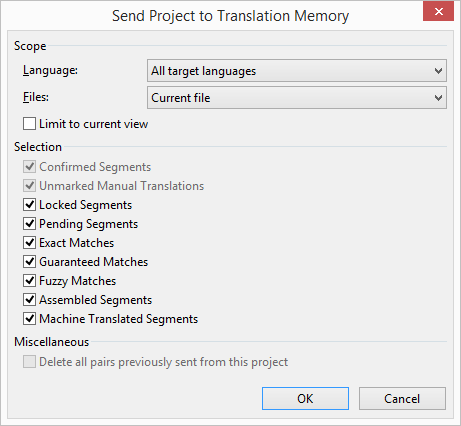
- Access the section of the Ribbon called Project, and in the Translate section click Add to Translation memory.
- In the dialog that appears, make sure that the options All Target Languages, Current File are selected.
- Make sure that all the options under the heading of Scope are checked, except for Limit to current view.
- Reimport the file that won’t export:
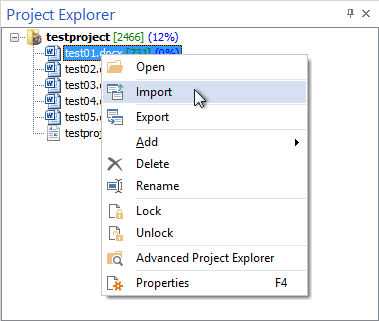
- Right-click on the file’s name in the Project Explorer.
- If you need to use a different filter to reimport the document, or you need to use different options, modify the filter properties for the file now.
- Select the option Import.
- If you are shown a warning that reimporting will cause your translations to be deleted, don’t worry: the new TM we sent the file to before has every translation in it.
- Accept the warning.

- Once the file has been imported, pre-translate it.
- Check the translations and finish up any segments that may have been left only partially translated (only a few, most likely).
- Run an automated tag check (Ctrl+Shift+F8) to make sure the tags are okay.
|


Comments